Liquid Fimo
Hey guys,
Some of you may know that I start out life as a traditional model maker and once worked for Games workshop. It's funny to think how life is circular and that I've returned to the things I started doing over 20 years ago. Although I love using digital software, there's nothing like getting your hands messy and building something with your fingers.
I've been doing a lot of scenery making to get back into things before I start parting any models again.
This weekend we had a double typhoon, so it was definitely a good time to stay in and get some model making done. You can buy a lot of resin and polymer kits, but it can start to get expensive when your just free forming and making experimental stuff.
Then, cut it up even smaller. Like really small. I would recommend going even smaller or possibly using a fine cheese grater.
Next, put it in a sealable bag
Then, put that in another sealable bag. You really don't want this stuff accidentally escaping.
Add about 1 cap of paint thinner full for each fimo strip. Add another half cap to make it more runny. In this bag I used 3 caps.Hazard warning! If you've never used this before be careful. It's toxic and creates a very potent smell in the house.
Seal both bags, and leave it for a few hours.
Press and squish the contents together carefully avoiding bag breakage, until it's a nice smooth paste. At this point, you can get fancy add some sand, small broken cork pieces to get extra textures in there.
Some of you may know that I start out life as a traditional model maker and once worked for Games workshop. It's funny to think how life is circular and that I've returned to the things I started doing over 20 years ago. Although I love using digital software, there's nothing like getting your hands messy and building something with your fingers.
I've been doing a lot of scenery making to get back into things before I start parting any models again.
This weekend we had a double typhoon, so it was definitely a good time to stay in and get some model making done. You can buy a lot of resin and polymer kits, but it can start to get expensive when your just free forming and making experimental stuff.
The Green Stuff from Games Workshop is a great two-part modelling putty that is useful for filling in gaps on models and sculpting additional details but has real trouble in tropical heat and usually dries up pretty quick without monthly attention.
Building lots of sandbags last week, I started experimenting with Fimo. It's pretty cheap here and perfect for my use, but I was struggling to get the nice smooth finish with texture and detail. So I decided to make my own paste solution.
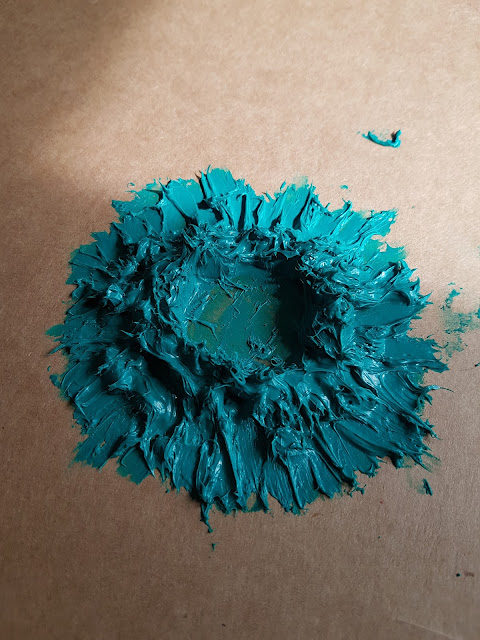
Making a big bag and keeping stored shouldn't be a problem and it drys fairly slowly giving you time to build up layers and make details. I was really happy with my explosive crater results. This stuff is also great for filling in large gaps around building structures and adding that unnatural demon / xeno / spore wall disintegration effect.
So, here's how I did it. Remove the packaging. (Duh)
And, then cut it up.
Then, cut it up even smaller. Like really small. I would recommend going even smaller or possibly using a fine cheese grater.
Next, put it in a sealable bag
Then, put that in another sealable bag. You really don't want this stuff accidentally escaping.
Add about 1 cap of paint thinner full for each fimo strip. Add another half cap to make it more runny. In this bag I used 3 caps.Hazard warning! If you've never used this before be careful. It's toxic and creates a very potent smell in the house.
Seal both bags, and leave it for a few hours.
Press and squish the contents together carefully avoiding bag breakage, until it's a nice smooth paste. At this point, you can get fancy add some sand, small broken cork pieces to get extra textures in there.
Cut a corner off and your ready to go, well almost....
Now you're good to start modeling. This stuff looks runny but still has a fimo like quality and starts to harden in about ten minutes. You can build it up and press texture onto it and shape it as desired. Once dried you just apply some watered down PVA and add paint to finish the effect.
* Do not bake it, putting hazardous flammable chemicals into your oven not only increases the chances of it setting fire and falling apart but also turning the air in your house toxic. Not fun.
* Do not bake it, putting hazardous flammable chemicals into your oven not only increases the chances of it setting fire and falling apart but also turning the air in your house toxic. Not fun.


