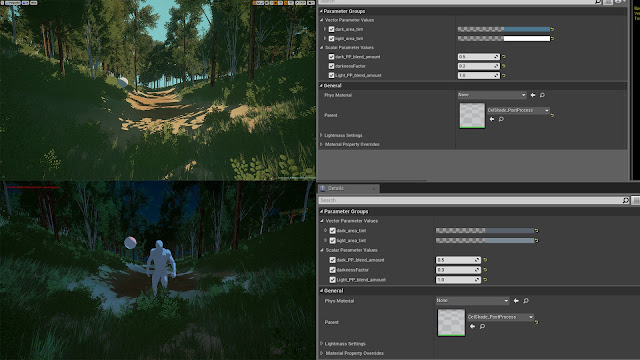
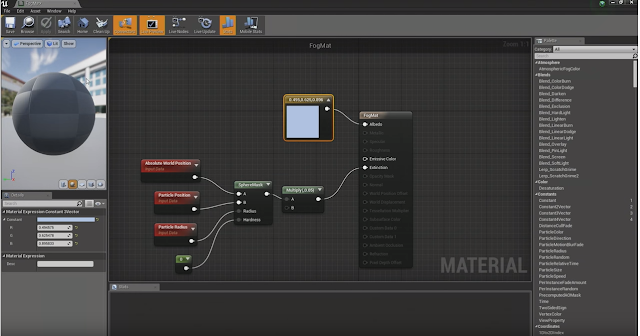
UE4 Cell Shaded Post Process by Thura Oo
Recently I was researching into creating a cartoon style effect using post process that could be applied to any project.
I found this amazing post on the Unreal Engine community thread, by Thura Oo. I really hate just copy pasting stuff but I'm worried in a few years it may have disappeared. I'm just simply passing the knowledge along and keeping it safe. I've tested it in my own projects and it works great, this more time and care I could get it looking really nice but honestly, I just don't have the time right now as it's not a project priority.
I didn't do any of the hard work, this stuff is great and I really would recommend reading the full page:
https://forums.unrealengine.com/showthread.php?141594?utm_source=launcher&utm_medium=chromium&utm_term=spotlight&utm_content=celshader&utm_campaign=communitytab
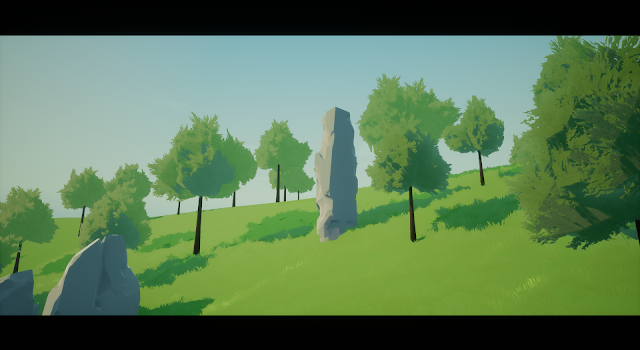
Woodbound not only uses this effect, but they own it. They really have mastered this and I can't wait to check out their game once it's completed.
https://www.playwoodbound.com/
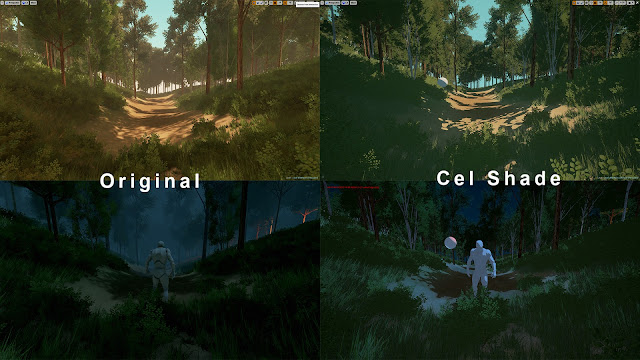
If you want to cel shade in UE4, and also get the light colors back, also want to work with skybox, unlit materials, and point lights and also don't want to write your own custom shading model, I hope this thread will help you.
Limitations
Do not work well with specular, roughness, metallic and other reflection related things ( Don't use those things in your material, set specularity to 0).
Do not work with near distance exponential fog. (Set its distance to large values like 5000 if you still want to use)
Do not work with god rays.
Depends on the brightness of the scene.
You better use fixed value of the auto exposure :min brightness = 10 and max brightness = 2
Overall Logic
We extract the desaturated lighting of the scene so we get the black and white color of the extracted lighting (0 to 1). According to that lighting, we can give the scene whatever shade we want depending on if the light is greater or less than 0.5. Then we add the original post process to the scene to get the light colors back. Then we out-mask the skybox with scene depth and give it original post process effect. You can use custom depth to mask the objects you want to cel shade. That's all.
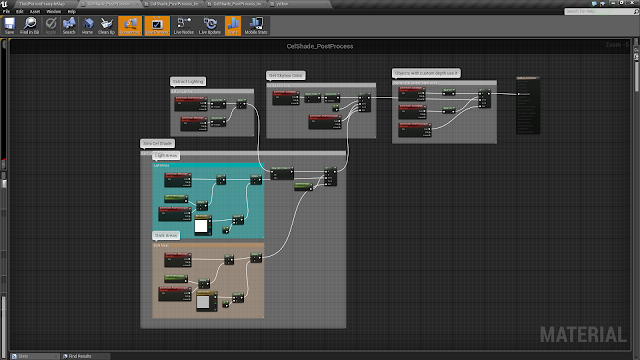
Only the objects with "custom depth" property set to true will get the cell shade. If you want to apply the cel shade to your whole scene, remove the group "Objects with custom depth use it" completely and plug the output of "if" from the group "Get skybox color" into emissive.
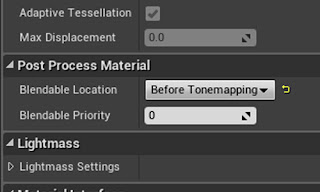
First of all create a postprocess material, then chosse the Blendable Location to Before ToneMapping (Super Important). If you don't do this, tone mapping will disturb the process of extracting the lighting form the scene.
Light is multiplied onto the diffuse color. So to extract the light from the scene, we have to divide the diffuse color from the scene. NOT subtract it. If you want to understand it well, plug it to the emissive.
So we get the black and white lighting to the scene. If the light is greater than 0.5, we give scene bright shade, if less than 0.5, we give the scene dark shade. You can replace the shades with whatever shade you want.
The parameter "darkness Factor" is very important. It decides whater to give dark shade or bright shade.
This method depends on the brightness of the light of your scene. If your scene is very low-lighted (below the value of darkness Factor), your scene will be covered with dark shadows. If your scene is very bright-lighted (above the darkness Factor), there will be no dark shadows.
So you have to adjust the darkness Factor value depending on the brightness of the lighting of your scene. If your scene is too bright-lighted, you increase the darkness Factor amount so that you can get the shadows back. If your scene is very low-lighted, you decrease the darkness Factor amount to very small value so that you get the bright shading back.
The group "light areas" is for bright shade and "dark areas" is for dark shade.
The parameters "Light_PP_blend_amount" and "Dark_PP_blend_amount" are the parameters that controls how much original post process will be blended onto your scene. If you want to get the light colors back, you have to blend the popost processnto your scene. This method breaks the fully flat 2D anime look cel shading but it give you the light colors back and unlit materials. If you want to cell shade like fully flat 2D anime, than set those values to 0 and you will lose your light colors.
I think it is impossible to look like 2D anime, and you still want to get your light colors and you still want to do it with post process material.
The parameters "light area tint" and "dark area tint" are the ones that gives you bright shade tint and dark shade tint. Change "light area tint" to larger values so your light areas become brighter and "dark area tint" to smaller values so your dark areas become darker. As they are vector 3 parameters, you can tint bright shade and dark shade seperately with colors.
If you want to get the fully flat 2D anime cell shade, set the Light_PP_blend and dark_PP_blend to zero and you can fakethe lighting color by setting bright_area_tint and dark_area_tint with colors.
Create a material instance of this post process material, assign it to Post Process volume and play around with the parameters until you get the best result.
Out-mask the skybox with scene depth multiplied with 100000 because the skybox is the most far-away object in your scene and it's scene depth is always 1.
The objects with "custom depth" property set to true will get the cell shade. If you want to apply the cel shade to your whole scene, remove the group "Objects with custom depth use it" completely and plug the output of "if" from the group "Get skybox color" into emissive.
By only using this celShade post process material, you will not get the perfect beautiful cel shade scene like magic.
Stylized rendering needs artistic skill and the beauty of it depends on the colors you choose, your textures, objects and details you add into your textures.
To get the best flat look play around with Contrast, Saturation, Crush Highlights, Bloom and Tint Color in your postprocess volume.
I hope this thread helps you. (It really has, thank you!)
