Gaslands - Car Tutorial Show Case *Updated
...And I haven't even received my rulebook yet, but I'm already building miniatures.
So what is this new game, I hear you ask?
Gaslands is a tabletop game of post-apocalyptic vehicular mayhem. With fast and cinematic rules, it is designed to be played with toy cars, allowing players to ram, skid and race their way through the wreckage of a burnt-out Earth (or another planet). Gaslands is published by Osprey Games and is easily available on the internet. I got mine at www.bookdepository.com as they do free shipping worldwide!

After watching several videos and recently finishing a post apocalyptic VR game at work, I was in the mood to do some physical kit bashing. Although I've been playing and painting for year, I'd never done this before and was eagerly looking forward to it. There is something exciting about taking a toy car and then making it look like something out of Mad max.
(Edit. That's a half lie. I did do something similar, just only on my transformers, as a child who has just discovered his dad's soldering iron. But that ended up in regret and tears.)
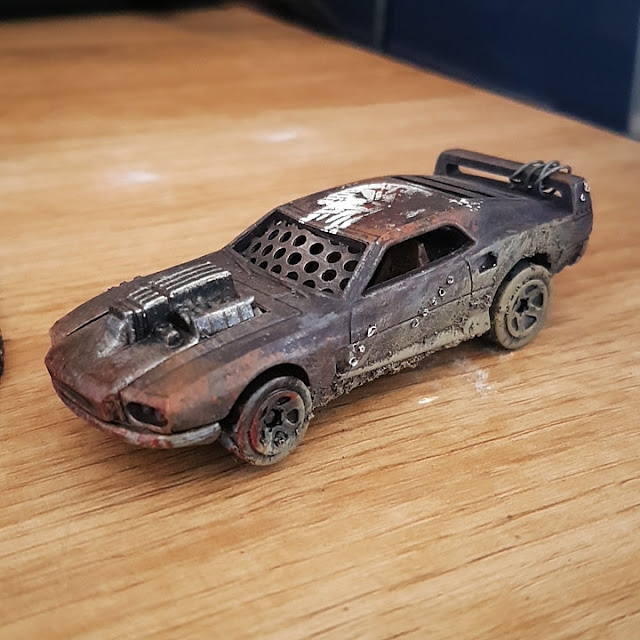
So, stage one. Buy a cool looking car. Thank you Black Widow, you'll do nicely.

Take it apart, glue the wheels, paint the underside, interior, Engine and rust up the body.

Use a sponge to dab white glue in the areas I want to keep the rust.

Cut out and shape some plastic mesh.

Glue it in place and paint.

Give it a spray. I went for a nice midnight purple, but after all the later texture and weathering you'd never tell.

Once I've got some more kits and bits to make some weapons and a ram, I'll update this page. But basically from hear you can just go nuts. I've got a Punisher-style skull on the roof (with added scratches for realism) Pinhole Bullets with silver paint, dry brushed blood on the bumper and wheels and then lovely fine grit sand texture pretty much all over the back of the car. I'm gonna add a few skulls and maybe a flag or something... Wouldn't it be great to have some drivers too :)
Next up is the Prowler performance car with Nitro and flamethrowers!
Happy modding guys!
* UPDATE
The 2007 Drift King is a fantastic toy. Absolute pain to drill out the rivets, but still great. Once it was in pieces, it still looked great without the metal panelling. Like some sort of 1950's street racer. I might have to get another one.
This was the original. I'm purchasing these cars at our local Carrefour when I do a food shop. No special trips, just grab one if it catches my eye. They are about 50nt which is roughly £1.25.

Followed the same paint process as before, and I ended up with this beauty.

Now, the cars have guns, nitro and rams in the game, so I need to add that in. There are lots of websites offering bits and pieces from 3D printed to resin cast parts. They look great but are pretty expensive with shipping. Nothing a few plastic sheets and pipes can't fix.

With the mounted machine gun and ammo chain completed, the explosive ram was a lot of fun to build. I used some round tubing for the sticks of dynamite too.

As it turns out, the plastic piping has a very high melting point and was impossible to bend around the side of the car and form together at the back. So, I just decided to cut them and then just glue some new bits onto the sides.


Success! Not bad at all. The photos dont do these two justice but you get the idea. Now to get stuck in and play some games!