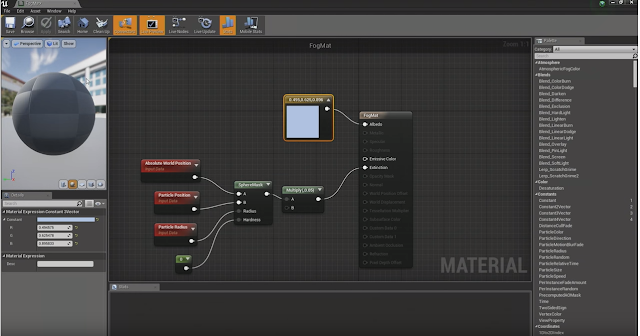
UE4 Game Mechanics - The basics
Over the last four to five years I've mainly focused on the conception and visualisation of many projects and not had to worry about the coding and technical blueprint assembly other than material and asset based stuff.
But over the last few months, I've been putting together several demo games and some portfolio pieces and have really pushed hard into these unknown areas to develop my knowledge. Going back to the basics is tough and world building without visualising it first, is an odd process for me. But the more I learn, the more fascinating and quicker I'm becoming.
So these are some of the core basic blueprints I've needed to get things working. Of course, every project is different so tweaking and adaptation is vital.
1. How to open a level and End the game.
Most VR games have a start room for players to familiarize themselves with the controls. Once they are ready to go an operator pushes a button and the game begins.
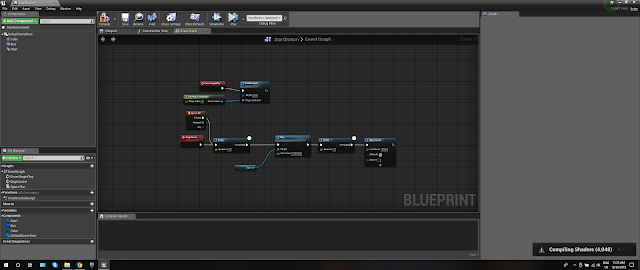
Likewise, some events or special requests will call for the game to close.
2. Enable and Disable Input
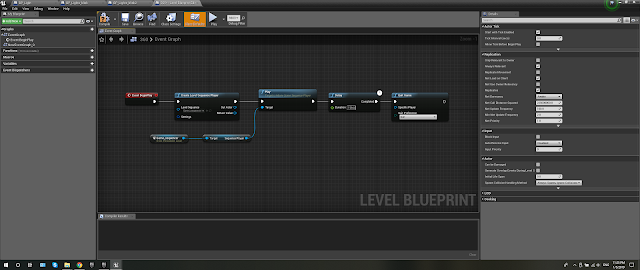
When cinematic events occur or players complete a goal, you'll need to disable the input. This is straight forward but can get complicated when having more than 4 players.
3. 360 Stereo Sphere
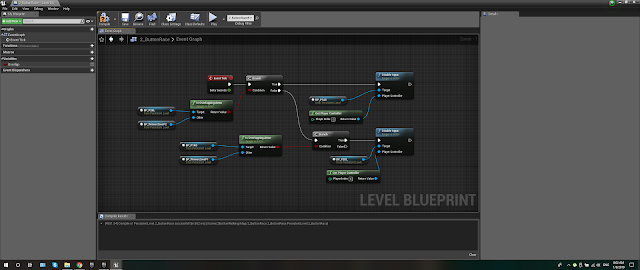
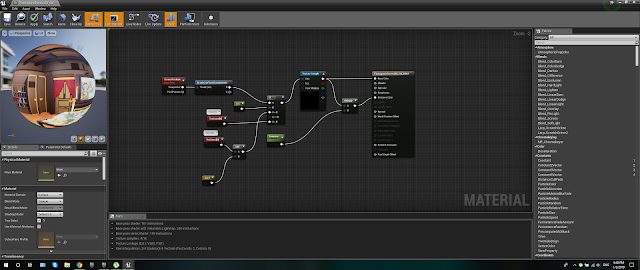
I'm sure I've covered this before, but just in case. I have done a lot of work for my portfolio that required it to be viewed in VR. A 2D image just doesn't do it justice. Using an Ansel hi resolution screenshot texture this is then turned into a material and played on a mesh sphere. The material is two sided so when the player enters the sphere it's almost like being in the level. I've seen a lot of VR museum experiences start doing this too.
4. Teleportation
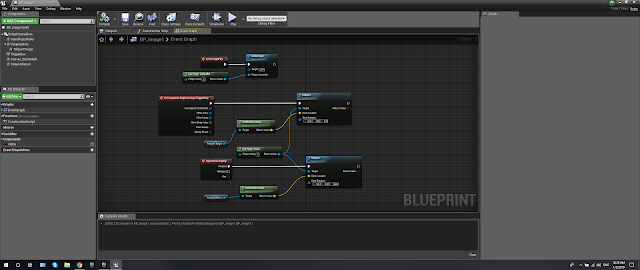
Not the VR click and movement system but rather when you have an object collision. For example using the 360 stereo sphere is going to require either turning off everything else in the map and enabling the visibility of the sphere or simply teleporting the player. This happens instantly and the player won't notice this. Using the 'Any Key' input node can bring the player back to the same or a different position.
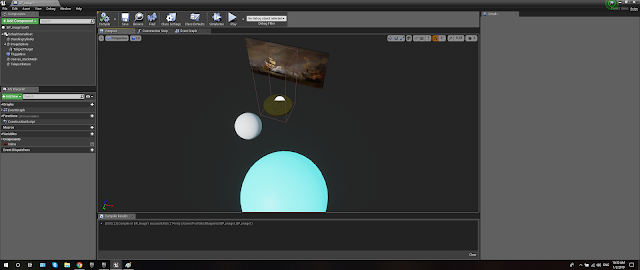
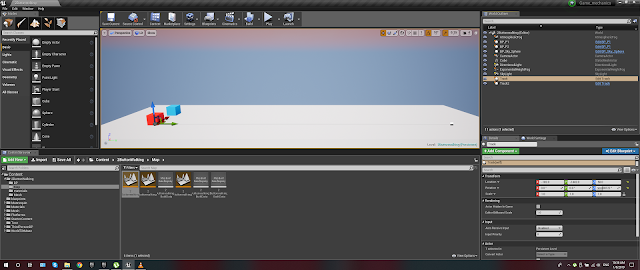
Here it's all built in a blueprint. The player will move into the collision box on the gold disk whilst looking at the painting. They are then teleported inside the large blue sphere (texture not added) to look around in full 360 stereo. Sound can also be added to enhance the experience. The player is then returned to the smaller white sphere.
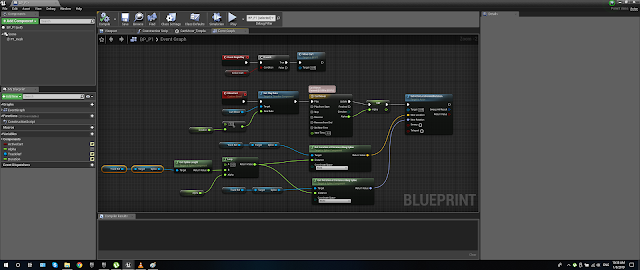
The blueprints look like this.
5. The Widget
Text can be placed in may ways in the level. Directly into the scene, played in front of the camera in the player blueprint or built into a widget which is then called when required. The first two are very simple and require no explanation but using widgets are a Pandora's box of unknown functions.
This is a simple menu for my testing project. When building anything from technical blueprints to assembling mesh assets and textures it's always a good idea to have a test project to checks everything is working or looking how it should. Pushing it straight away into a live project can be a bit of a nightmare if you then need to start changing stuff, especially if other programmers or artists have already started using it. The visual difference from Substance painter into UE4 can be huge.
So, I needed a way to navigate around the maps without coming out of the game. A simple level blueprint with an input key can be added to each map to return to the main menu.
Make sure the widget is enabled.
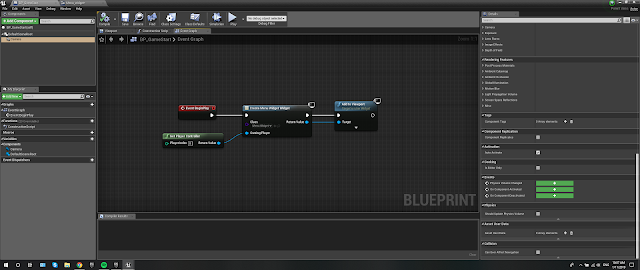
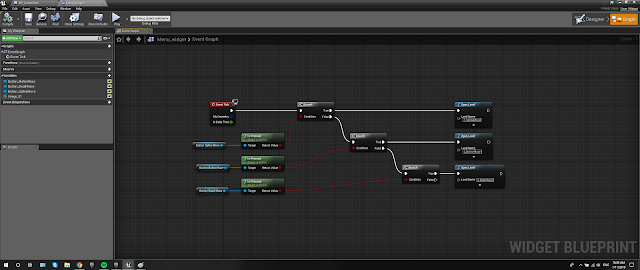
Inside the widget use the Event Graph to open the maps.
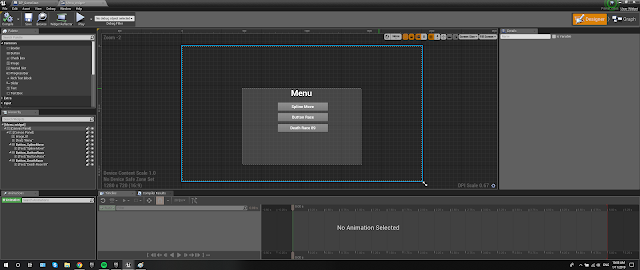
This is a simple click menu to be displayed on screen.
6. Spline Movement
Making a lot of environments and storytelling elements is a great experience and often towards the crunch things can change a lot. Using a sequencer is fine and can be a perfect solution but it's time consuming and will take even longer to change multiple keyframes if something needs to be adjusted. Using a spline is by far a better solution. With more control, accuracy and variable options I don't think I'll ever go back.
Ok straight forward. You have your asset and a spline. Set the start node (event, delay or beginplay) and the duration time. Don't forget to attach the mesh to the spline in the 'details' column.
That's it for now. Im working on a lot more stuff and will be adding new posts soon and probably updating this one.
Happy developing!
But over the last few months, I've been putting together several demo games and some portfolio pieces and have really pushed hard into these unknown areas to develop my knowledge. Going back to the basics is tough and world building without visualising it first, is an odd process for me. But the more I learn, the more fascinating and quicker I'm becoming.
So these are some of the core basic blueprints I've needed to get things working. Of course, every project is different so tweaking and adaptation is vital.
1. How to open a level and End the game.
Most VR games have a start room for players to familiarize themselves with the controls. Once they are ready to go an operator pushes a button and the game begins.

Likewise, some events or special requests will call for the game to close.

2. Enable and Disable Input
When cinematic events occur or players complete a goal, you'll need to disable the input. This is straight forward but can get complicated when having more than 4 players.

3. 360 Stereo Sphere
I'm sure I've covered this before, but just in case. I have done a lot of work for my portfolio that required it to be viewed in VR. A 2D image just doesn't do it justice. Using an Ansel hi resolution screenshot texture this is then turned into a material and played on a mesh sphere. The material is two sided so when the player enters the sphere it's almost like being in the level. I've seen a lot of VR museum experiences start doing this too.

4. Teleportation
Not the VR click and movement system but rather when you have an object collision. For example using the 360 stereo sphere is going to require either turning off everything else in the map and enabling the visibility of the sphere or simply teleporting the player. This happens instantly and the player won't notice this. Using the 'Any Key' input node can bring the player back to the same or a different position.
Here it's all built in a blueprint. The player will move into the collision box on the gold disk whilst looking at the painting. They are then teleported inside the large blue sphere (texture not added) to look around in full 360 stereo. Sound can also be added to enhance the experience. The player is then returned to the smaller white sphere.

The blueprints look like this.

5. The Widget
Text can be placed in may ways in the level. Directly into the scene, played in front of the camera in the player blueprint or built into a widget which is then called when required. The first two are very simple and require no explanation but using widgets are a Pandora's box of unknown functions.
This is a simple menu for my testing project. When building anything from technical blueprints to assembling mesh assets and textures it's always a good idea to have a test project to checks everything is working or looking how it should. Pushing it straight away into a live project can be a bit of a nightmare if you then need to start changing stuff, especially if other programmers or artists have already started using it. The visual difference from Substance painter into UE4 can be huge.
So, I needed a way to navigate around the maps without coming out of the game. A simple level blueprint with an input key can be added to each map to return to the main menu.
Make sure the widget is enabled.

Inside the widget use the Event Graph to open the maps.

This is a simple click menu to be displayed on screen.

6. Spline Movement
Making a lot of environments and storytelling elements is a great experience and often towards the crunch things can change a lot. Using a sequencer is fine and can be a perfect solution but it's time consuming and will take even longer to change multiple keyframes if something needs to be adjusted. Using a spline is by far a better solution. With more control, accuracy and variable options I don't think I'll ever go back.
Ok straight forward. You have your asset and a spline. Set the start node (event, delay or beginplay) and the duration time. Don't forget to attach the mesh to the spline in the 'details' column.


7. Random Float
Adding a random float value for the energy amount increases the gameplay excitement as it can have a direct effect on the game without being too noticeable depending on the range. This works well for players who are consistently better than others and gives everyone a small edge over the other players.
Adding a random float value for the energy amount increases the gameplay excitement as it can have a direct effect on the game without being too noticeable depending on the range. This works well for players who are consistently better than others and gives everyone a small edge over the other players.
Happy developing!


