Posts

How to Blend assets with your Landscape in UE4 Runtime with Virtual Texturing (RVT)

Image
Virtual Texture support for your project enables you to create and use large-sized textures for a lower—and more consistent—memory footprint at runtime. RVT supplies an efficient way to render complex, procedurally generated, or layered materials. This makes RVT ideal for rendering complex materials for Landscapes. It enables improved rendering performance and workflows for Landscape Splines, decals for meshes and materials, along with general Landscape and object blending. The unreal Sensei provides a great tutorial on how to set up virtual textures: The unreal engine documentation can be found here: https://docs.unrealengine.com/4.27/en-US/RenderingAndGraphics/VirtualTexturing/ The process is divided into four parts: 1. Enabling VT in the project 2. Creating Runtime Virtual Textures 3. Landscape Master Material for RVT 4. Asset Master Material for RVT 1. Enable virtual Textures and mobile support in project settings.  As simple as it sounds, also enable mobile support. The projec...
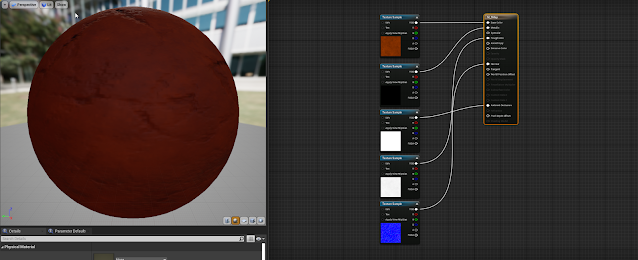
Advanced Channel Packing

Image
An advanced technique for packing data into texture channels that allows you to represent all of the texture data needed for a material in just two texture samples. Using this method saves both texture memory and performance, but since you're packing non-normal data in with the normal map, you do lose a little bit of quality in the normal. It also requires doing some extra steps in the shader to unpack the normal data Traditional 5-Map set-up: 1. Albedo / Diffuse 2. Metalic 3. Roughness 4. Normal 5. Ambient Occlusion ORMS 3-Map set-up: Does exactly the same as the 5-Map material but in 3. 1. Albedo / Diffuse  2. Metal, Roughness and AO  3. Normal Advanced Channel Packing 2-Map set-up: Does almost exactly the same as the 3-Map material but in 2. 1. Albedo / Diffuse + Roughness in the Alpha Channel 2. Red and Green Channel for Normal, Blue for AO *Make sure SRGB is set to off and to use BC7 in the compression settings for the textures. Watch the tutorial here:

Quick start guide to using Gaea

Image
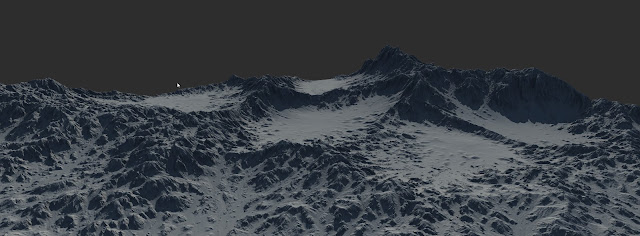
If you are completely new to Gaea terrain software, start with watching the 6-minute video to create your first landscape terrain and to familiarize yourself with the Gaea Interface in the Getting around documentation. 3D Viewport, 2D viewport, the graph and properties panel: The Using Gaea section explains various concepts in detail, such as using Create with Primitives to build scenes, harnessing the power of Eroding Terrains to make realistic terrains, creating Procedural Textures , and outputting using the Build Manager . https://docs.quadspinner.com/Reference/ The Node Reference gives you access to details about every node and sculpting tool in Gaea. Use the top menu to navigate the different node type groups. In individual node pages, you will find detailed descriptions, usage advice, parameter reference, and usage examples. The Tutorials section contains complete tutorials that show you how to accomplish a complete project. The QuickStarts section has over 50 scenarios of di...

How to use Unreal Insights with Oculus Quest (A work in progress)

Image
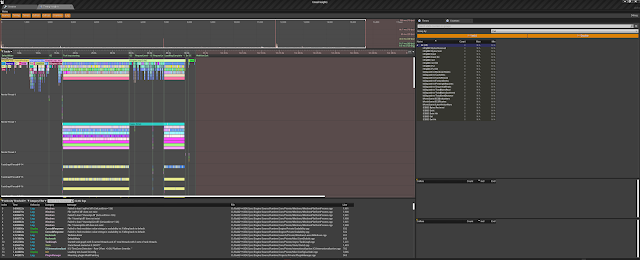
How to use Unreal Insights with Oculus Quest Unreal Insights is a great new profiling and analysis tool that allows you to quickly find bottlenecks, performance spikes, threading patterns and much more. Any Unreal Engine developer building a game or app for Oculus Quest should have Unreal Insights in their toolbelt. The set-up process takes a short amount of time and after you do it once, it's set up forever and you’ll wonder how you ever lived without it. Let’s get started.   Requirements: Unreal Engine version 4.24+  Tracing enabled in built development app (on by default) Unreal Insights Executable built or downloaded (<CloneDir>\UnrealEngine\Engine\Binaries\Win64\UnrealInsights.exe and Solution ‘UE4’ > Programs > UnrealInsights in solution explorer) 1. Setup your UE4 project for Oculus as described here: https://developer.oculus.com/documentation/quest/latest/concepts/unreal-quick-start-guide-quest/ Then run Unreal Insights tool which is located in C:\\Program...

UE4 360 Stereo Image and Movie Capture

Image
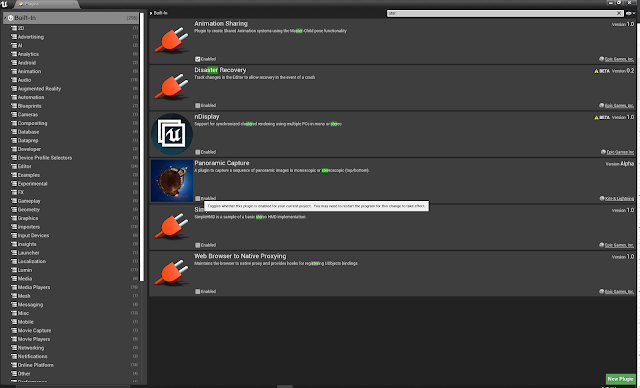
Back in 2016 I did some research into this topic, coming from a motion picture background this stuff really interests me, especially as real-time rendering and visualization effects are becoming more practical and widely used. The need to capture 360 video and images is still a thing. Surprisingly not much has changed over the last four years. The two strongest and most easily available are the 'Panoramic Capture' plugin by Kite and Lightning devs, and Nvidia's 'Ansel' plugin. The Panoramic Capture plugin for UE4 allows you to capture still images or movies that can then be viewed or played back in stereo, giving the illusion that the world is being rendered in real time. In the following sections, we will take a look at how to set up and use the Panoramic Capture plugin and also take a look at how you can view the stereo images you create. https://docs.unrealengine.com/en-US/Platforms/VR/DevelopVR/StereoPanoramicCapture/index.html https://docs.unrealengine.com/en-U...

Ten Principles for Good Level Design

Dan Taylor provides a Ramsian-style breakdown of how to create world-class levels, which distills the art and science of level design down to a concentrated set of fundamental principles for innovation, engagement, and immersion. Watch the full video here: https://www.youtube.com/watch?v=iNEe3KhMvXM Quick guide breakdown: Good level design is fun to navigate but throw in some chaos. Does not reply on words to tell a story. Tells the player what to do, but not how to do it by giving clear objectives. Good level design constantly teachers the player something new with new mechanics Surprise players by taking risks and changing aesthetics or pacing. Embrace the escapism and empower the player. Use risk reward so players can choose there own difficulty dynamically. Design of non linearity, bidirectionalarity, modularity and efficiency. Work backwards to create an emotion response using level mechanics Level design is driven by mechanics. These are not weighted in prior...

Level Design Philosophy and Tips For Designing a Level

Building a great level is hard, seriously, it's tough to create a map that people will love and want to reply.  It's important to avoid making generic maps, this is more simple than one would imagine. Give it a name simple name. Yes, this seems to go against all previous ideas of being agile, flexible and having the ability, but it's that non-commitment which is  limiting yourself to a theme might inhibit your design process. A simple and unique name will open the door to imagination. A good way to find a suitable name is working around the underlying feeling and emotion of the level. Make sure it's simple and easily describable. The level name will help to 'theme' the map, and providing it works within your overall game design, then you're good to start  Build your level around the name will help to inspire creativity and make a memorable experience for players. As a designer it will give it purpose and meaning. Personality and theme are ...

Performance Guidelines for Mobile Devices - Quick Guide

Performance Guidelines for Mobile Devices - A quick reference guide In-depth documentation here: https://docs.unrealengine.com/en-US/Platforms/Mobile/Performance/index.html LDR (Low Dynamic Range) Low Dynamic Range (LDR) mode is the lowest performance tier supported in UE4 and is recommended for games that do not require lighting or Post Processing features. To use this mode, you must disable Mobile HDR for your project in the Rendering section of the Project Settings . Basic Lighting In this tier, you will leverage Static lighting and fully rough Materials to create levels with interesting lighting while maximizing performance to reach a broader range of mobile devices. To use this mode, you must disable Mobile HDR for your project in the Rendering section of the Project Settings . Full HDR (High Dynamic Range) Lighting In this tier, you take advantage of most of the HDR lighting features available for mobile in UE4, as well as some of the Post Processing features. Using these ...

Anti-aliasing quick review

Quick recap on Anti-aliasing. FXAA Take the image without any AA applied and blur the high contrast parts. Really that’s it. Can catch large aliased shapes pretty well, but will either completely mash small details or miss them. Basically, if there’s something that can’t be seen in the original un-anti-aliased image, FXAA isn’t going to know about it either. It’ll also generally messes with text pretty badly. On the plus side it’s super inexpensive. MSAA Hardware level geometric edge anti-aliasing. This only applies to geometry edges, so any aliasing produced from shading (like specular highlights on smooth surfaces or detailed normal maps) won’t get any benefit. It also has some issues with over interpolation which can produce more aliasing on some geometry edges than not having any AA. Produces close to ground truth results in many cases where lighting / shading isn’t a factor, but can still be expensive, especially at higher sample counts. Also only works when using Forward renderi...

Achieving Cinematic quality with post-process effects in UE4 - Part2

Image
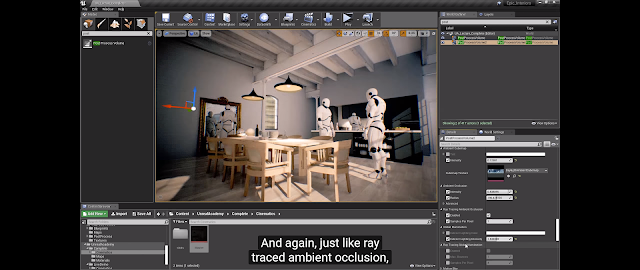
Part 2 Indirect Lighting intensity can be adjusted. Turn on ray tracing reflections.  Adjust setting depending on visualization and performance requirements. Ray tracing translucency can also be turned on. Increasing the max reflection rays will turn black objects back to translucent. Enable Ray tracing global illumination. Performance may be taking a huge hit at this point, so adjust the setting and turn off what you don't require. Post-process. can also be controlled in the sequencer Adding properties setting will give you full control within the scene. Post-process Materials Post-process materials are easy to make and just like any material can be as simple and as complicated as you like. The G-buffer contains everything you'll need for these effects. Create a material as usual and c hange the surface to post-process. This material once complete can be dragged into the post=process material array. You can combine many effects here. A useful pass is the custom depth-stencil. ...