Achieving Cinematic quality with post-process effects in UE4 - Part2
Part 2
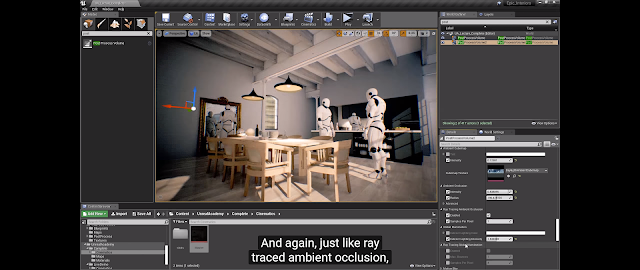
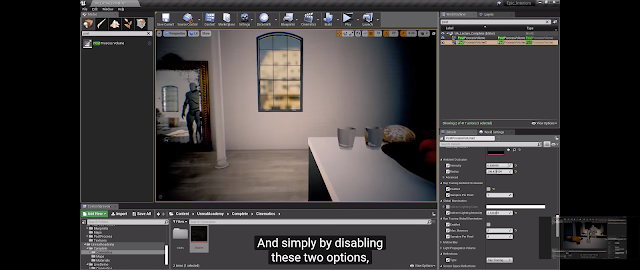
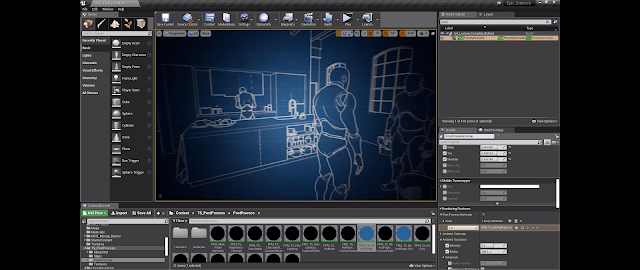
Indirect Lighting intensity can be adjusted.
Turn on ray tracing reflections. Adjust setting depending on visualization and performance requirements.
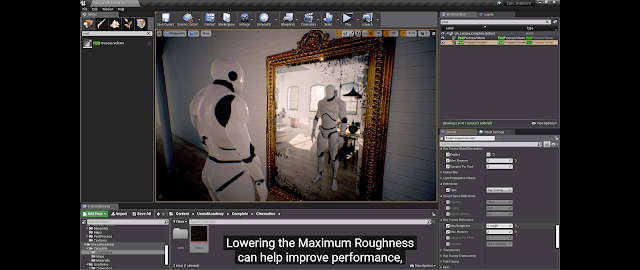
Ray tracing translucency can also be turned on.
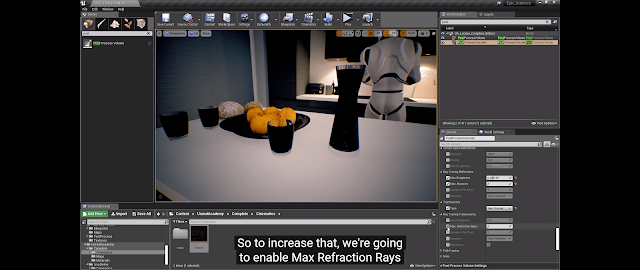
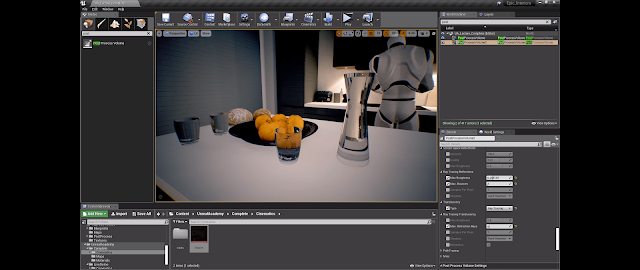
Increasing the max reflection rays will turn black objects back to translucent.
Enable Ray tracing global illumination.
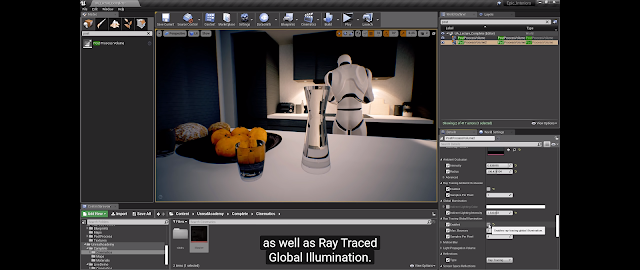
Performance may be taking a huge hit at this point, so adjust the setting and turn off what you don't require.
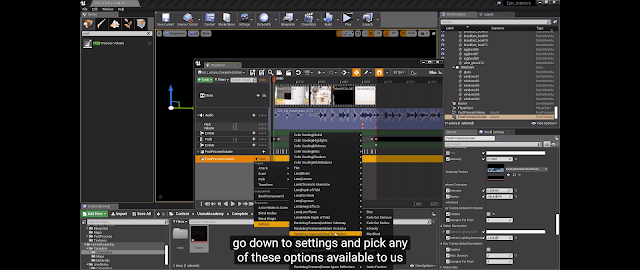
Post-process. can also be controlled in the sequencer
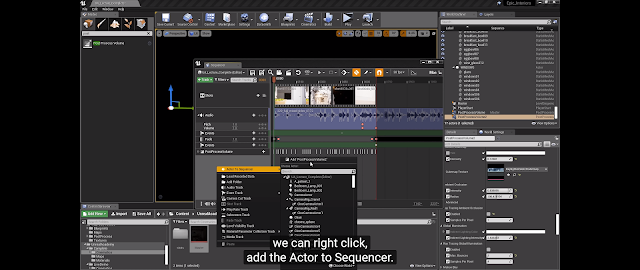
Adding properties setting will give you full control within the scene.
Post-process Materials
Post-process materials are easy to make and just like any material can be as simple and as complicated as you like.
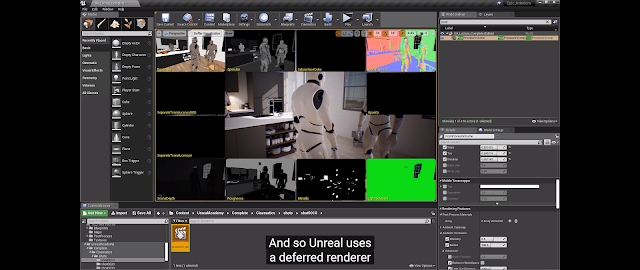
The G-buffer contains everything you'll need for these effects.
Create a material as usual and change the surface to post-process.
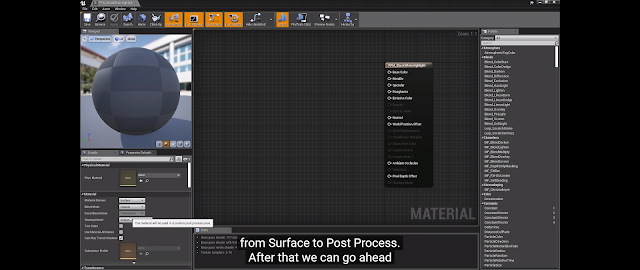
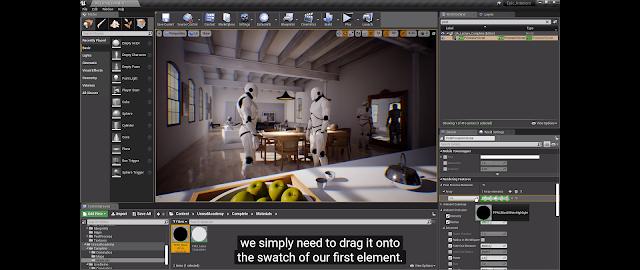
This material once complete can be dragged into the post=process material array. You can combine many effects here.
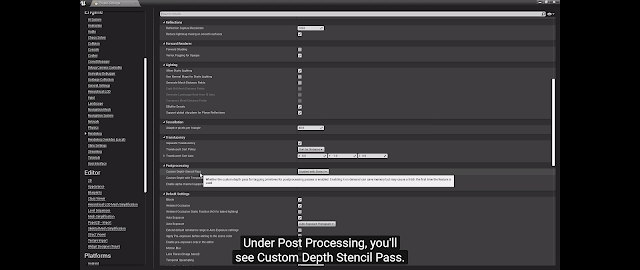
A useful pass is the custom depth-stencil. This will need to be activated in the project settings.
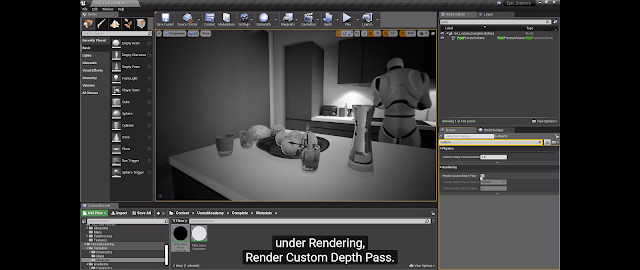
And then selected in the details panel.
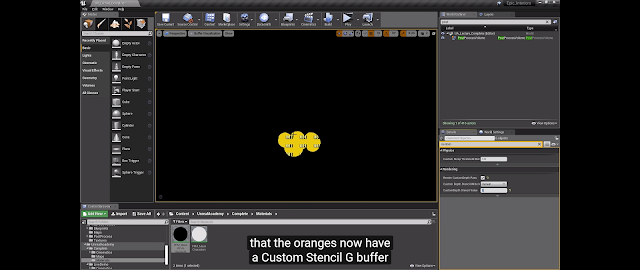
Highlighting an object and giving it a custom depth stencil value will allow you to control it in the material.
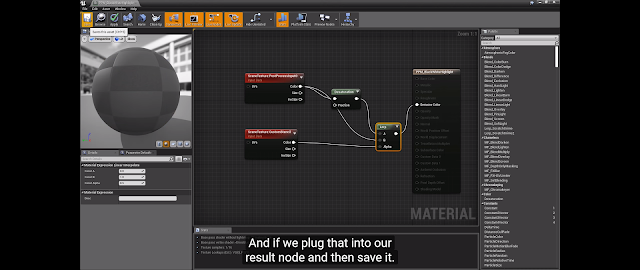
Here is our finished material using a desaturation for the whole scene but not effecting our stencil object, which will remain in full colour.
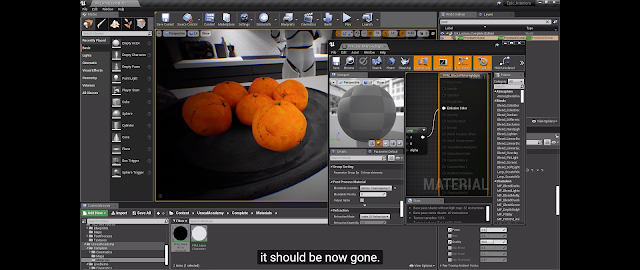
You also can control when the post-process happens. Currently, it's right at the end after tone mapping and this gives a higher saturation and a ghost edge effect. This isn't right.
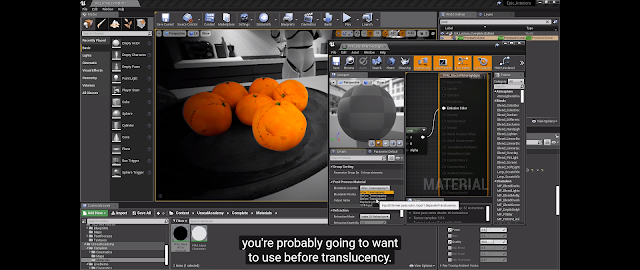
We can easily change this by selecting a different order for it to be processed. Before translucency will work for this object but it may affect other processes in the scene. Finding a balance and adjusting them is sometimes necessary.
Thank you Technical Artist Matthew Doyle for putting this great video together.
Indirect Lighting intensity can be adjusted.

Turn on ray tracing reflections. Adjust setting depending on visualization and performance requirements.

Ray tracing translucency can also be turned on.

Increasing the max reflection rays will turn black objects back to translucent.

Enable Ray tracing global illumination.

Performance may be taking a huge hit at this point, so adjust the setting and turn off what you don't require.

Post-process. can also be controlled in the sequencer

Adding properties setting will give you full control within the scene.

Post-process Materials
Post-process materials are easy to make and just like any material can be as simple and as complicated as you like.

The G-buffer contains everything you'll need for these effects.

Create a material as usual and change the surface to post-process.

This material once complete can be dragged into the post=process material array. You can combine many effects here.

A useful pass is the custom depth-stencil. This will need to be activated in the project settings.

And then selected in the details panel.

Highlighting an object and giving it a custom depth stencil value will allow you to control it in the material.

Here is our finished material using a desaturation for the whole scene but not effecting our stencil object, which will remain in full colour.

You also can control when the post-process happens. Currently, it's right at the end after tone mapping and this gives a higher saturation and a ghost edge effect. This isn't right.

We can easily change this by selecting a different order for it to be processed. Before translucency will work for this object but it may affect other processes in the scene. Finding a balance and adjusting them is sometimes necessary.

Thank you Technical Artist Matthew Doyle for putting this great video together.


