UE4 Optimization Workflow
Mobile VR is back on track and looks like it's going to lead the way forward an amazing technology. Untethered six degrees of freedom is the most immersive VR experience you can have at the moment.
For us game devs and artists, it also brings the most challenges. Maintaining solid performance whilst creating enjoyable gameplay and high-quality visuals. Not an easy task at all.
back in 2017, I posted a short review of the optimization workflow. It was enough to get the basics down and increase the framerate, but it's a great time now to dive deeper into this subject.
Nearly all the optimization workflow guides I have looked at, all have nearly the same grounded philosophy:
These all apply to Mobile VR with a few additional ones as the performance budget is tighter:
It sounds like a long arduous task optimizing shaders, draw calls and meshes all day without breaking content, but luckily the Hierarchical Level of Detail HLOD system is available within the Unreal Engine. More about that later. Let's start at the beginning for a refresher.
The basics (Checking the scene)
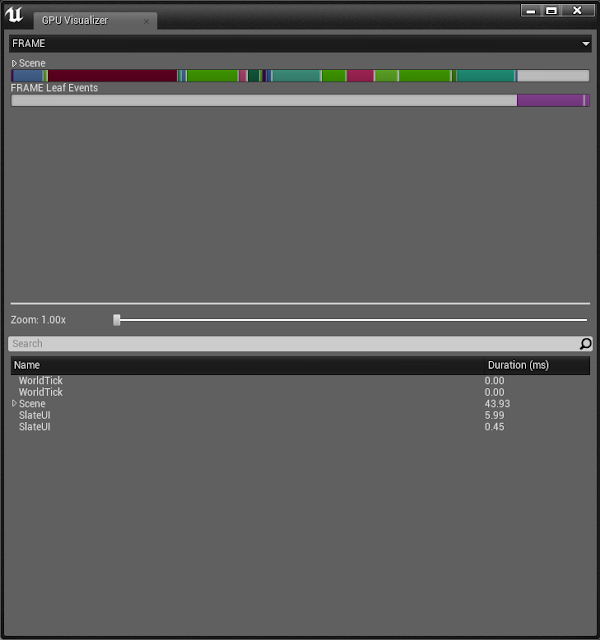
When building a scene it's important to check the GPU visualizer (ctrl,shift and ,) regularly to see where the resources are being used and how you can manage them better.
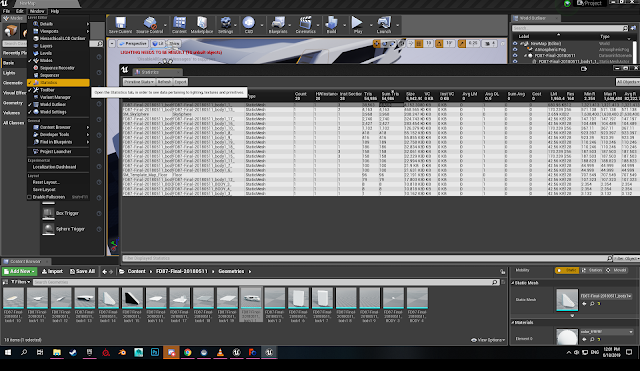
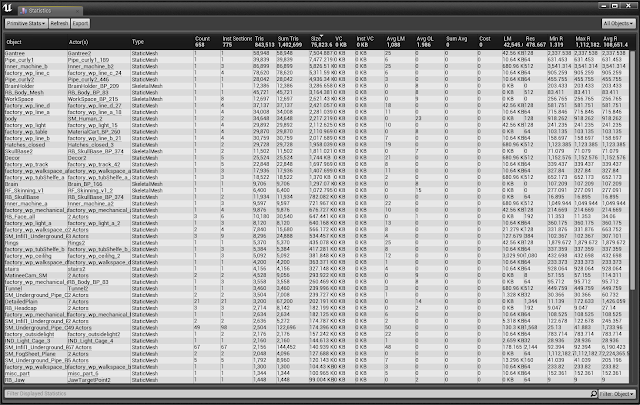
Statistics (in the drop-down) gives you an in-depth review of all the assets in the scene, you can check a lot of important information here very quickly and is an absolute must for scene optimization.
One of my favorites is 'Buffer Visualization'. This gives you a quick overview of all render elements.
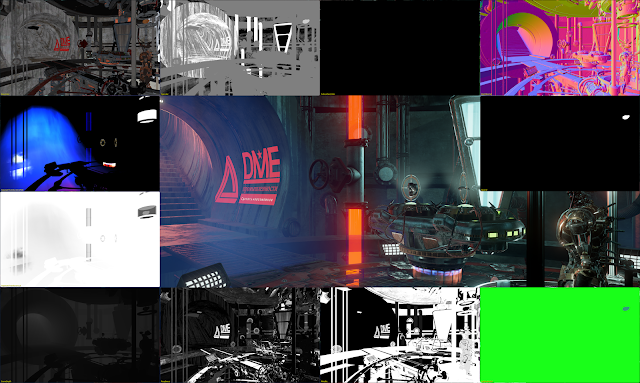
Unlit view
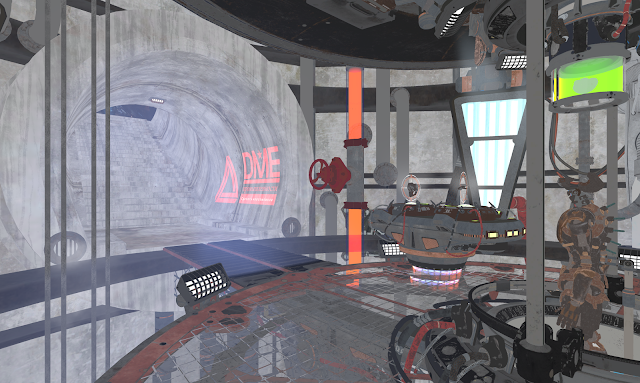
Lightmap Density (Green is good, Red is bad)
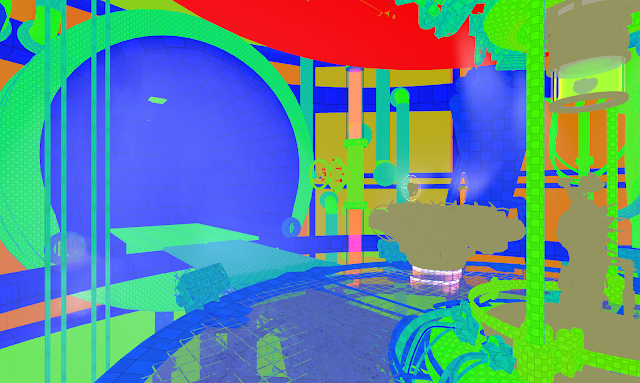
Shader complexity (As you can see, the red indicates some heavy shaders. This scene has some problems...)
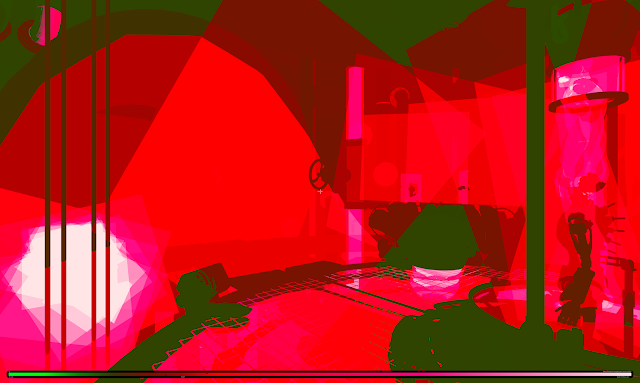
Light complexity

Lighting only
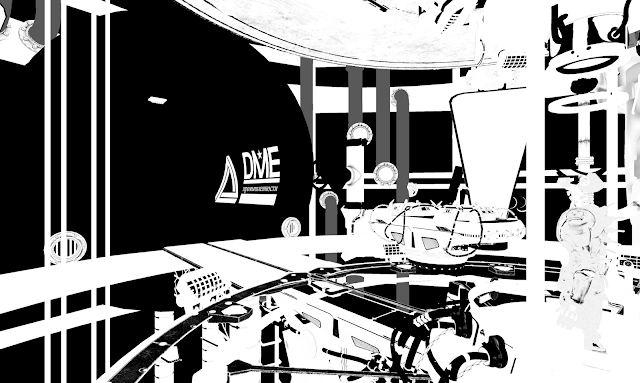
Metallic only
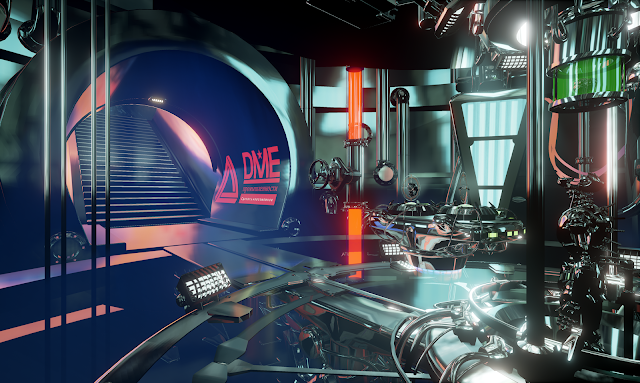
Reflections only
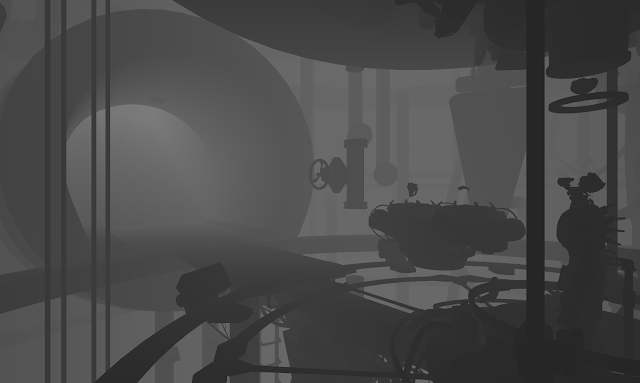
Scene depth
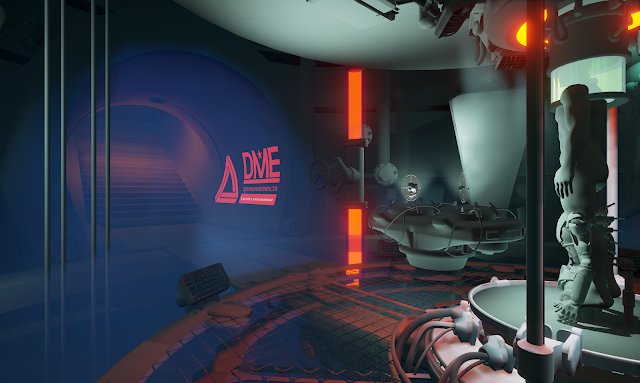
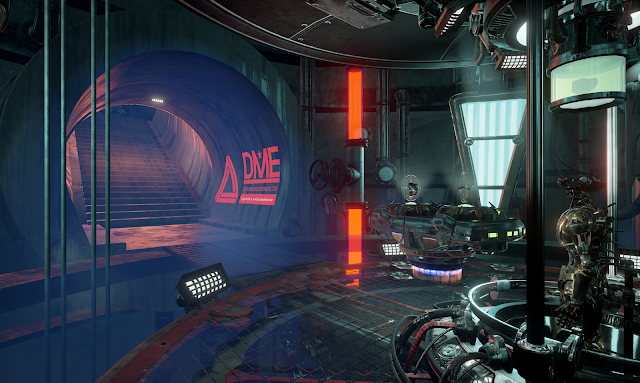
And the Final Screenshot Render from the project.
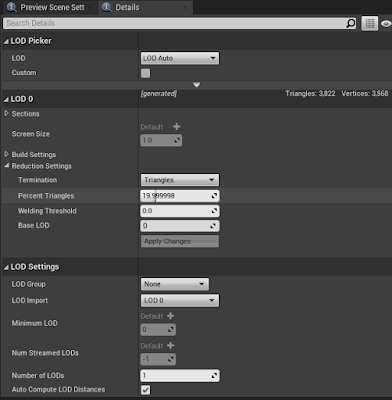
Manual Mesh Reduction
In the static mesh details panel, you can manually reduce the number of triangles in the mesh. This is an excellent way to maintain quality and performance.
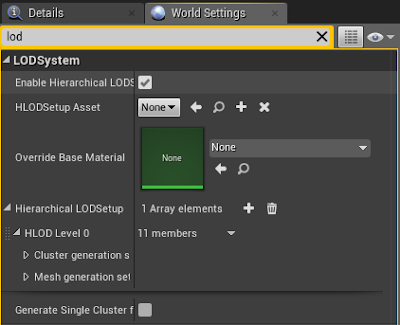
Hierarchical Level of Detail system (HLOD)
The HLODing process generally consists of two phases:
Generating clusters
The process of grouping actors in the scene to form a Proxy Mesh.
It can be done manually or automatically.
Select Hierarchical LOD outliner from the Window dropdown.
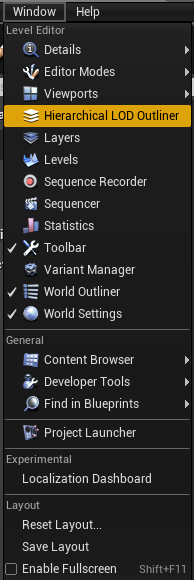
Check your Material Setting and Texture size, merge materials that don't have any transparency. Generate Proxy Meshes or Rebuild all.
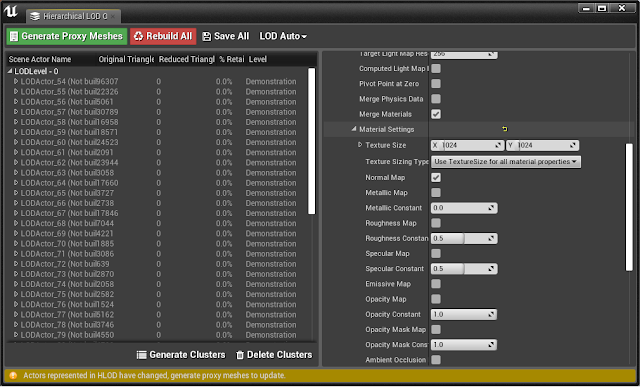
Building proxy meshes
The process of merging the source meshes (and Materials) to be used for rendering the Proxy Mesh.
The merged mesh is optimized in various ways:
Separate meshes are merged into one, reducing the number of draw calls.
Material Merging. Reduces the number of Materials and simplifies them.
The options provided by the HLOD system provide a good start for anyone who wants to use it for optimizations.
Improved Automated Cluster Generation
Cluster generation is the first step of the HLOD process. Here, static mesh actors are selected to be clustered into a proxy mesh manually. The following new improvements have been made to the clustering system.
Added Visibility Culling
One of the bigger improvements made was the ability to remove mesh triangles that would never be visible to the player. It's important to have a defined play-space that the player is constrained to. The play-space is represented with one or multiple volumes or even spline through a level. During the creation of HLOD assets, the tool will remove all the triangles that are never visible from the play-space.
This culling not only significantly lowers the number of triangles that are needed to render, but it also removes a lot of wasted texture space. You don't want to add invisible pixels in our new baked textures, so removing these triangles allows you to gain more resolution in your textures.
Improved Atlas Methods
During the Material merging, textures get put into a texture atlas. By default, the HLOD system uses a grid-based solution. It is possible to get different resolutions per packed asset, but this is based on the texture size of the asset. Sometimes, some objects used in the background get a lot of texture space allocated because they happened to have a big texture of any kind in their Material. The big texture map could have multiple reasons: Combined assets in one big texture map or a prop designed to be close to the play-space was used in the background as well. In any of these cases, the asset would get a lot of space in the combined atlas.
The volumes we used for Triangle Culling offered us the ability to pack the atlas in a better way. Here's a list of improvements made on the atlasing side.
Atlas is created after Triangle Cullin.
UVs are regenerated to gain optimal packing.
Objects closer to the play-space get more resolution than objects further away.
Lightmap resolution is also taken into consideration when defining the size of an object in the packed texture.
With these improved atlas methods, we were able to boost our overall texture quality a lot. Textures close to the play-space were packed in a 4K texture. This would gradually become smaller when you move further away from the play-space.
Material Baking extensions
Another change made to the Material merging process was to provide more options for baking textures to the atlas. The system offered the ability to bake down and combine textures, but it was limited to the PBR workflow. Baking down the final output into one texture was not possible. Epic has implemented a system that allows the artists to control what got baked back into the final texture.
Bake Base Color
The default UE4 baking method is to combine the base color input into a newly generated texture and keep the PBR shading. It combines the Normal map and packed Metallic, Roughness, and the Ambient Occlusion map are also baked down with this option. This is mostly used for objects close to the play-space that still required dynamic shading.
Bake Diffuse
Bake the lightmap and the Base Color into a single texture map.
The Unreal engine continues to grow at an amazing pace, with new updates every few months. Epic's engine continues to help me grow and develop my skills.
Thanks, Epic!
For a deeper read into Hierarchical LOD, please check out the official UE4 blog By Sander Smid-Merlijn & Ron Kamphui. https://www.unrealengine.com/en-US/tech-blog/pushing-the-boundaries-of-mobile-vr-with-stunning-environments
For us game devs and artists, it also brings the most challenges. Maintaining solid performance whilst creating enjoyable gameplay and high-quality visuals. Not an easy task at all.
back in 2017, I posted a short review of the optimization workflow. It was enough to get the basics down and increase the framerate, but it's a great time now to dive deeper into this subject.
Nearly all the optimization workflow guides I have looked at, all have nearly the same grounded philosophy:
- Optimization needs allow for artistic freedom and future iterations.
- Optimization needs to be automated as much as possible.
- Optimization must be non-destructive.
- Optimization is part of the workflow from the start of a project with regular testing.
These all apply to Mobile VR with a few additional ones as the performance budget is tighter:
- Shader Complexity needs to be as cheap as possible
- Reduced unnecessary Draw call count. Changing states is expensive. Aim for somewhere between 140 to 160 on the Oculus Quest.
- Raw vertex data is very limiting. Reduce the triangle count to around 150 thousand.
It sounds like a long arduous task optimizing shaders, draw calls and meshes all day without breaking content, but luckily the Hierarchical Level of Detail HLOD system is available within the Unreal Engine. More about that later. Let's start at the beginning for a refresher.
The basics (Checking the scene)
When building a scene it's important to check the GPU visualizer (ctrl,shift and ,) regularly to see where the resources are being used and how you can manage them better.

Statistics (in the drop-down) gives you an in-depth review of all the assets in the scene, you can check a lot of important information here very quickly and is an absolute must for scene optimization.


One of my favorites is 'Buffer Visualization'. This gives you a quick overview of all render elements.

Unlit view

Lightmap Density (Green is good, Red is bad)

Shader complexity (As you can see, the red indicates some heavy shaders. This scene has some problems...)

Light complexity

Lighting only

Metallic only

Reflections only

Scene depth

And the Final Screenshot Render from the project.

Manual Mesh Reduction
In the static mesh details panel, you can manually reduce the number of triangles in the mesh. This is an excellent way to maintain quality and performance.

Hierarchical Level of Detail system (HLOD)
The HLODing process generally consists of two phases:
Generating clusters
The process of grouping actors in the scene to form a Proxy Mesh.
It can be done manually or automatically.

Select Hierarchical LOD outliner from the Window dropdown.

Check your Material Setting and Texture size, merge materials that don't have any transparency. Generate Proxy Meshes or Rebuild all.

Building proxy meshes
The process of merging the source meshes (and Materials) to be used for rendering the Proxy Mesh.
The merged mesh is optimized in various ways:
Separate meshes are merged into one, reducing the number of draw calls.
Material Merging. Reduces the number of Materials and simplifies them.
The options provided by the HLOD system provide a good start for anyone who wants to use it for optimizations.
Improved Automated Cluster Generation
Cluster generation is the first step of the HLOD process. Here, static mesh actors are selected to be clustered into a proxy mesh manually. The following new improvements have been made to the clustering system.
- Speed improvement of cluster generation by implementing an alternative clustering algorithm (for the curious, we settled on hierarchical agglomerative clustering).
- Added cluster constraints to gain more control over the type of Materials that are clustered together.
- Cluster constraints could be Material type and even static switch values of Materials,
- Added more cluster generation options.
Added Visibility Culling
One of the bigger improvements made was the ability to remove mesh triangles that would never be visible to the player. It's important to have a defined play-space that the player is constrained to. The play-space is represented with one or multiple volumes or even spline through a level. During the creation of HLOD assets, the tool will remove all the triangles that are never visible from the play-space.
This culling not only significantly lowers the number of triangles that are needed to render, but it also removes a lot of wasted texture space. You don't want to add invisible pixels in our new baked textures, so removing these triangles allows you to gain more resolution in your textures.
Improved Atlas Methods
During the Material merging, textures get put into a texture atlas. By default, the HLOD system uses a grid-based solution. It is possible to get different resolutions per packed asset, but this is based on the texture size of the asset. Sometimes, some objects used in the background get a lot of texture space allocated because they happened to have a big texture of any kind in their Material. The big texture map could have multiple reasons: Combined assets in one big texture map or a prop designed to be close to the play-space was used in the background as well. In any of these cases, the asset would get a lot of space in the combined atlas.
The volumes we used for Triangle Culling offered us the ability to pack the atlas in a better way. Here's a list of improvements made on the atlasing side.
Atlas is created after Triangle Cullin.
UVs are regenerated to gain optimal packing.
Objects closer to the play-space get more resolution than objects further away.
Lightmap resolution is also taken into consideration when defining the size of an object in the packed texture.
With these improved atlas methods, we were able to boost our overall texture quality a lot. Textures close to the play-space were packed in a 4K texture. This would gradually become smaller when you move further away from the play-space.
Material Baking extensions
Another change made to the Material merging process was to provide more options for baking textures to the atlas. The system offered the ability to bake down and combine textures, but it was limited to the PBR workflow. Baking down the final output into one texture was not possible. Epic has implemented a system that allows the artists to control what got baked back into the final texture.

Bake Base Color
The default UE4 baking method is to combine the base color input into a newly generated texture and keep the PBR shading. It combines the Normal map and packed Metallic, Roughness, and the Ambient Occlusion map are also baked down with this option. This is mostly used for objects close to the play-space that still required dynamic shading.
Bake Diffuse
Bake the lightmap and the Base Color into a single texture map.
The Unreal engine continues to grow at an amazing pace, with new updates every few months. Epic's engine continues to help me grow and develop my skills.
Thanks, Epic!
For a deeper read into Hierarchical LOD, please check out the official UE4 blog By Sander Smid-Merlijn & Ron Kamphui. https://www.unrealengine.com/en-US/tech-blog/pushing-the-boundaries-of-mobile-vr-with-stunning-environments


